Autofitting columns in Excel for Office 365 ensures your data fits perfectly within columns, making it readable and neat. Select your columns, access the Format menu, and choose “Autofit Column Width.” Manual adjustments can also be made for a tailored fit.
Our guide continues below with more information about autofitting spreadsheet columns, including more information about this process, and the pros and cons of doing it.
Ah, Excel! A wonderful tool where rows meet columns, numbers dance with functions, and spreadsheets give birth to insights. But sometimes, those columns can be a bit… cramped. Ever had that moment when you’ve typed something long and it just disappears beyond the edge of the column? Worry not! I’m here to guide you through the easy steps of autofitting those columns to make everything look just right.
Related: How to Export Google Sheets to CSV
Why Should You Autofit?
Remember when you were a kid and tried to fit into your older sibling’s shoes? They were either too big or too small, right? In the world of Excel, columns are those shoes. And data? That’s you. Autofitting columns ensures your data fits perfectly, making it more readable and neat.
Steps to Autofit Columns in Excel for Office 365
- Opening Your Excel Document – Open Excel (Office 365 version). Open the document you want to work on. This could be a budget sheet, a list of your favorite movies, or anything else.
- Selecting Columns – At the top of your Excel sheet, you’ll find letters representing each column: A, B, C, etc. Click on the letter of the column you want to autofit. Want to select multiple? Just click and drag!
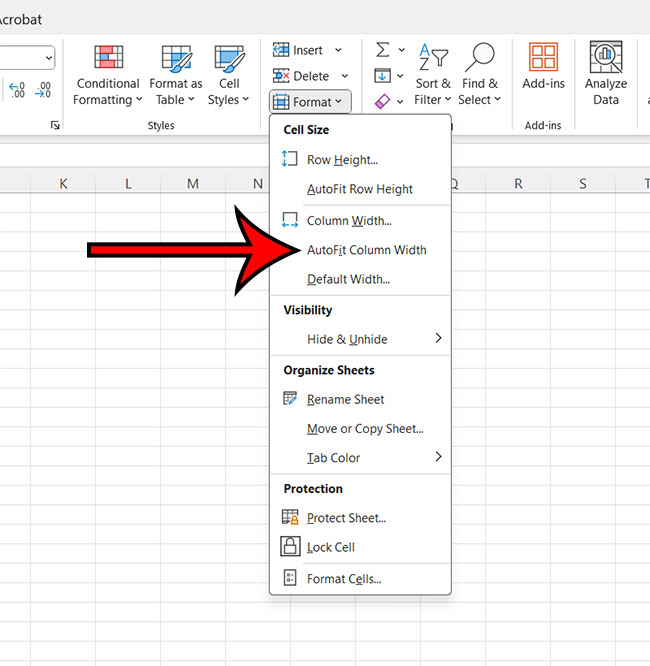
- Accessing the Format Menu – Once you’ve chosen your column(s), choose the Home tab at the top of the screen, then click on Format in the Cells section of the ribbon. A dropdown menu appears.
- Choosing Autofit – From the dropdown menu that you should now see, simply click on the AutoFit Column Width option, which should automatically resize the selected columns so that data within those columns is visible.
- Manual Adjustments (if needed) – Maybe autofit did its job, but you want to tweak the size just a smidge. No problem! Hover between the column letters until your cursor turns into a line with arrows. Drag it to adjust the column width as you please.
Pros and Cons of Autofitting
Pros:
- Easy Peasy: With just a few clicks, your columns adjust to fit your data. Simplicity at its best.
- Clean Look: Autofitting gives your sheet a neat appearance. It’s like giving your data a fresh haircut!
Cons:
- Not Always Perfect: Sometimes, autofit might not get the width just right. But hey, no worries! You can always make manual adjustments.
- Uniformity Issues: If you have one super long piece of data in a column, autofitting might make the rest look spaced out. But then again, manual tweaks can come to the rescue.
In Conclusion
Autofitting columns in Excel for Office 365 is a walk in the park. With a few simple clicks, you can make your data look neat and professional. Just remember, like all tools, it’s about how and when you use them. So, go on and give those columns a stretch, or maybe even a little squeeze, and let your data shine!
FAQs
- Can I autofit rows in Excel? Absolutely! The process is similar. Instead of selecting columns, you’d select rows and follow the same steps.
- Is there a keyboard shortcut for autofitting columns? You bet! After selecting your column(s), press ALT + H + O + I.
- What if autofit doesn’t resize my columns properly? Sometimes, autofit might get it wrong. In such cases, manually adjust the column width using the drag method.
- Does autofitting affect my data in any way? Not at all! Autofitting only changes the column width, not the data inside.
- Can I set a default column width for all my Excel sheets? Yes, you can! Go to the Format menu and select “Default Width” to set a consistent width for all columns in your sheets.
Kenneth is a longtime Google Sheets and Microsoft Excel user that has incorporated the application into both his personal and professional life. He has also been a freelance writer for many years and has published numerous articles on various spreadsheet applications.